Difference between revisions of "Blog 18"
(→Volume) |
|||
| Line 5: | Line 5: | ||
*[http://www.bitwizard.nl/shop/raspberry-pi-ui-16x2 RPi_UI board] | ([[User Interface]]) |
*[http://www.bitwizard.nl/shop/raspberry-pi-ui-16x2 RPi_UI board] | ([[User Interface]]) |
||
Programmed |
Programmed with: |
||
*bash |
*bash |
||
*[[Bw tool]] |
|||
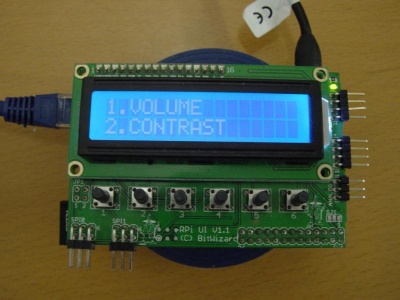
In this post I will show the menu I made, where you can change the: Backlight, Contrast and Volume. |
In this post I will show the menu I made, where you can change the: Backlight, Contrast and Volume. |
||
Revision as of 13:35, 23 November 2015
Settings Menu
Hardware I used on my Raspberry Pi:
Programmed with:
- bash
- Bw tool
In this post I will show the menu I made, where you can change the: Backlight, Contrast and Volume.
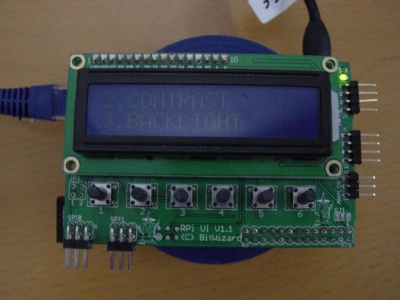
The overall script is based on the scroll menu from blog 13. You can scroll through the menu with button 5(up) and 6(down). On the screen there will be visible which of the 2 menu you can go to. With button 1 and 2 you can choose which of the 2 you want to use.
#!/bin/bash

bw_tool -I -D /dev/i2c-1 -a 94 -W 10:00

while true; do
BUTTON=`bw_tool -I -D /dev/i2c-1 -a 94 -R 30:b`

array=(   Volume Contrast Backlight )
# Element 0      1        2

Narray=(  VOLUME CONTRAST BACKLIGHT )
# Element 0      1        2

  if [ $BUTTON  != "00" ]; then
     bw_tool -I -D /dev/i2c-1 -a 94 -W 10:00
  fi

  if [ $BUTTON  = "20" ]; then
     ./${array[$Number]}
  fi

  if [ $BUTTON  = "10" ]; then
    ./${array[$Numb2]}
  fi

  if [ $BUTTON  = "08" ]; then
     Number=0
  fi

  if [ $BUTTON  = "04" ]; then
     exit
  fi

  if [ $BUTTON  = "02" ]; then
     Number=$(((Number + 2) % 3 ))
  fi

  if [ $BUTTON  = "01" ]; then
     Number=$(((Number + 1) % 3 ))
  fi

Numb2=$((Number + 1))
Numb3=$((Numb2 + 1))

bw_tool -I -D /dev/i2c-1 -a 94 -W 11:00
bw_tool -I -D /dev/i2c-1 -a 94 -t "$Numb2""."${Narray[$Number]}
bw_tool -I -D /dev/i2c-1 -a 94 -W 11:20
bw_tool -I -D /dev/i2c-1 -a 94 -t "$Numb3""."${Narray[$Numb2]}

sleep 1

done
Backlight/Contrast
This is the script for changing the backlight. The script for changing the contrast is almost the same. The only difference is that instead of writing to protocol 13 you write to protocol 12. So
bw_tool -I -D /dev/i2c-1 -a 94 -W 13:${array[$Number]}
Has to become
bw_tool -I -D /dev/i2c-1 -a 94 -W 12:${array[$Number]}
#!/bin/bash

bw_tool -I -D /dev/i2c-1 -a 94 -W 10:00

while true; do
BUTTON=`bw_tool -I -D /dev/i2c-1 -a 94 -R 30:b`

array=(   00 19 33 4c 66 7F 99 B2 CC E5 FF )
# Element 0  1  2  3  4  5  6  7  8  9  10

Narray=(   00 10 20 30 40 50 60 70 80 90 100 )
# Name     0  1  2  3  4  5  6  7  8  9  10

 if [ $BUTTON  != "00" ]; then
    bw_tool -I -D /dev/i2c-1 -a 94 -W 10:00
 fi

 if [ $BUTTON  = "04" ]; then
    exit
 fi

 if [ $BUTTON  = "02" ]; then
    Number=$(((Number + 10) % 11 )) # can be changed to 11 if you want it to get 1 down
 fi

 if [ $BUTTON  = "01" ]; then
    Number=$(((Number + 1) % 11 )) #can be changed to 1 if you want to get it up by 1
 fi

bw_tool -I -D /dev/i2c-1 -a 94 -W 11:00
bw_tool -I -D /dev/i2c-1 -a 94 -t "$Numb2"${Narray[$Number]}
bw_tool -I -D /dev/i2c-1 -a 94 -W 13:${array[$Number]}

sleep 1
done
array=(   00 19 33 4c 66 7F 99 B2 CC E5 FF )
# Element 0  1  2  3  4  5  6  7  8  9  10

Narray=(   00 10 20 30 40 50 60 70 80 90 100 )
# Name     0  1  2  3  4  5  6  7  8  9  10
The Array counts in hexadecimals, because protocol 13 and 12 work in hexadecimals. FF is in decimals 255. I just used an easy trick to get a tenth of 255. What is 25.5. What is around 19 in hexadecimals. After that I kept counting 19 up the hexadecimal number, until I reached FF. Now it got good steps between every time up and down. I made the Narray (text that will get displayed), because it is easer for people to understand 0 till 100, than 00 till FF.
Volume
The script makes it possible to make the audio 5/10 decibel louder or quieter.
$DISPL -t `amixer | grep Mono: | sed -e 's/%] .*//' -e 's/.* \[//'`
To script will at the end read at which volume percentage the audio is. With the grep and sed -e it will remove all the information outside the volume percentage. Normally without sed -e it would look like:
Mono: Playback -600 [91%] [-6.00dB] [on]
In blog 09 there is a deeper explanation about grep and the sed -e.
#mplayer ru.mp3
After every '#' I put an audio file, this is optional but there you could put a short audio file. So, that you can directly hear how loud the audio is.
#!/bin/bash

DISPL="bw_tool -I -D /dev/i2c-1 -a 94"

while true; do
BUTTON=`bw_tool -I -D /dev/i2c-1 -a 94 -R 30:b`

  if [ $BUTTON  != "00" ]; then
     bw_tool -I -D /dev/i2c-1 -a 94 -W 10:00
  fi

  if [ $BUTTON  = "20" ]; then
  amixer -c 0 set PCM 5dB-
  #mplayer ru.mp3
  fi

  if [ $BUTTON  = "10" ]; then
  amixer -c 0 set PCM 5dB+
  #mplayer ru.mp3
  fi

  if [ $BUTTON  = "04" ]; then
  exit
  fi

  if [ $BUTTON  = "02" ]; then
  amixer -c 0 set PCM 10dB-
  #mplayer ru.mp3
  fi

  if [ $BUTTON  = "01" ]; then
  amixer -c 0 set PCM 10dB+
  #mplayer ru.mp3
  fi

$DISPL -W 11:00:b
$DISPL -t `amixer | grep Mono: | sed -e 's/%] .*//' -e 's/.* \[//'`

sleep 1
done
Useful links
- User Interface
- Temperature Station, this can give extra information of how to work with grep.
- Scroll Menu, this can give more explanation about the scripting.

