Difference between revisions of "I2C connector pinout"
Jump to navigation
Jump to search
| (One intermediate revision by one other user not shown) | |||
| Line 37: | Line 37: | ||
== |
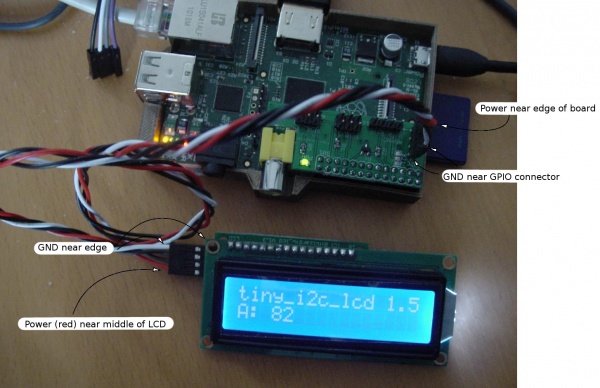
== Example connection to rpi_serial == |
||
[[File:i2c_connection.jpg|none|thumb|600px|alt=i2c connection to RPi_serial|i2c_lcd connected to rpi_serial]] |
|||
Latest revision as of 11:12, 10 December 2015
For the interconnect between I2C masters and the I2C expansion boards BitWizard uses a 4-pin I2C cable.
The connector is laid out as follows:
| pin | function | remark |
|---|---|---|
| 1 | GND | Power Ground |
| 2 | SDA | Serial I2C Data |
| 3 | SCK | Serial I2C Clock |
| 4 | VCC | Power 5V. |
Connecting the BitWizard boards to an Arduino
| pin | function | arduino pin | Arduino Mega |
|---|---|---|---|
| 1 | GND | GND | GND |
| 2 | SDA | A4 (Analog input 4) | Digital 20 |
| 3 | SCK | A5 (analog input 5) | Digital 21 |
| 4 | VCC | VCC | VCC |
You could use other pins, but then you have to make a software I2C implementation. This is not too difficult, but might be neccesary if something else is already on the I2C pins.
