Difference between revisions of "Motor"
(→Pinout) |
(→LEDs) |
||
| Line 60: | Line 60: | ||
=== LEDs === |
=== LEDs === |
||
The only LED is a power LED. |
|||
== jumper settings == |
== jumper settings == |
||
Revision as of 12:24, 7 May 2012
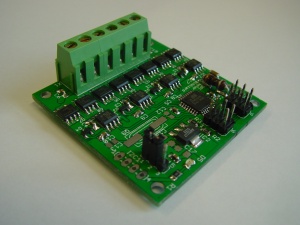
This is the documentation page for the SPI_motor board.
Overview
Assembly instructions
None: the board comes fully assembled.
Specifications
Possible Configurations
External resources
Datasheets
Additional software
Related projects
Pinout
For the SPI connector see: SPI_connector_pinout.
The output connector is connected as follows:
(Looking at the business end of the connector, counting from left to right)
| pin | function |
|---|---|
| 1 | Output A1 |
| 2 | Output A2 |
| 3 | Output B1 |
| 4 | Output B2 |
| 5 | GND |
| 6 | Vin |
Jumper
LEDs
The only LED is a power LED.
jumper settings
See solder jumpers on how to change the solder jumper.
By changing the solder jumper SJ1, you can make connector SPI1 (nearest to the board edge) into the ICSP programming connector for the ATmegaxx8 on the board.
Protocol
To make the motor PCB do things, you need to send things over the SPI bus to the PCB.
The general overview of the protocol is here.
The specific commands for the motor PCB are explained in Spi_motor_protocol.
For arduino, a sample PDE is available, called ardemo_lcd.pde, also at BitWizard software download directory .
This is a demo to send things using SPI to the lcd board. The SPI routines there are applicable for the motor board as well.
The software
Default operation
Future hardware enhancements
Future software enhancements
TODO: write a library to make handling this board easy.
Changelog
1.0
- Initial public release
