Difference between revisions of "Relay"
(→Pinout) |
(→LEDs) |
||
| Line 48: | Line 48: | ||
=== LEDs === |
=== LEDs === |
||
There is one power led. |
|||
There are two LEDs near each of the relays indicating the state of the relays. |
|||
== Jumper settings == |
== Jumper settings == |
||
Revision as of 17:10, 11 May 2012
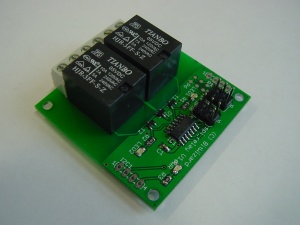
This is the documentation page for the SPI_relay and I2C_relay boards.
Overview
This board enables you to drive two relays.
Assembly instructions
None: the board comes fully assembled.
External resources
Datasheets
Additional software
Related projects
Pinout
For the SPI connector see: SPI_connector_pinout.
For the I2C connector see: I2C_connector_pinout.
| pin | function | remark |
|---|---|---|
| 1 | NO 1 | Normally open contact for relay 1 |
| 2 | C 1 | center connection for relay 1 |
| 3 | NC 1 | normally closed contact for relay 1 |
| 4 | NO 2 | Normally open contact for relay 2 |
| 5 | C 2 | center connection for relay 2 |
| 6 | NC 2 | normally closed contact for relay 2 |
LEDs
There is one power led.
There are two LEDs near each of the relays indicating the state of the relays.
Jumper settings
Protocol
To make the relay PCB do things, you need to send things over the SPI bus to the PCB.
The general overview of the protocol is here.
The specific commands for the relay PCB are explained on the page about the spi_dio board, as the two boards share the same protocol: spi_dio_protocol .
For arduino, a sample PDE is available, called ardemo_lcd.pde, also at BitWizard software download directory .
This is a demo to send things using SPI to the lcd board. The SPI routines there are applicable for the dio and relay boards as well.
The software
Default operation
Future hardware enhancements
Future software enhancements
Changelog
1.0
- Initial public release
