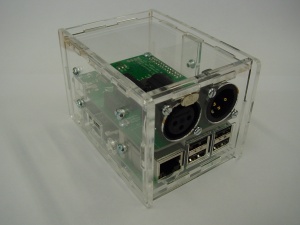
Dmx interface for raspberry pi
Introduction
The DMX interface for raspberry pi allows you to interface a raspberry pi with DMX hardware.
There is also a version "with FT245" That version adds the option to use your raspberry pi with our board as an Enttec USB Pro compatible device from another computer (raspberry pi or PC, Windows or Linux)
If you select "for pi zero" we give you an extra 40 pin male header and do not solder the matching female header onto our board. You can then chose several configurations yourself. The one I prefer is to have the male headers on the zero on the bottom, and the female on our board on the top. Keep in mind that if you arrange for the pi to stick out from under or above our board, the pinout is going to be wrong. So you can't put the connectors on both boards on top, and then flip one to make the connection.
Software
There are several software packages that can be used with your DMX interface for Raspberry pi.
First there are QLC+ and OLA. These are packages that run on Linux on the raspberry pi and allow you to control a DMX Universe.
Second, there are several packages by Arjan van Vught that use the raspberry pi "bare metal".
QLC+ and OLA
Don't forget to remove the console and getty from the serial port that the DMX inteface is using.
See: http://elinux.org/RPi_Serial_Connection#Preventing_Linux_using_the_serial_port
QLC+
Harold van Hulten wrote a nice "howto". See: http://www.udenix.nl/2016/how_did_i/rpi2dmx/
QLC+ 's home is at: http://www.qlcplus.org
OLA
Jessie
On raspbian jessie installing OLA is easy: apt-get install ola should do the trick. The downside is however that it doesn't work :-( .
what does work however is:
#sudo apt-get install automake libtool bison flex libcppunit-dev libprotobuf-dev libprotoc-dev protobuf-compiler protobuf-c-compiler
sudo apt-get build-dep ola
mkdir ola
cd ola
wget https://github.com/OpenLightingProject/ola/archive/0.10.1.tar.gz
tar xvfz 0.10.1.tar.gz
cd ola-0.10.1
#libtoolize
autoreconf -i
./configure
make -j 5 all
sudo make install
wheezy
On Wheezy, adding
deb http://apt.openlighting.org/raspbian wheezy main
to /etc/apt/sources.list, and then the apt-get install ola should work.
There are some important hints at: http://opendmx.net/index.php/OLA_Device_Specific_Configuration#UART_native_DMX
raspberry pi 3
Add:
dtoverlay=pi3-disable-bt
Otherwise, the wrong UART will be used. The "wrong" uart will
- change baudrate unexpectedly when the CPU feels hot.
- I haven't figured out if it CAN do the required baud rate, and/or how to do that.
This has the consequence that we've stolen back the good UART from the bluetooth that's present on the PI3.
On the raspberry pi forums there is talk about re-enabling bluetooth at a lower performance level.
all raspberries
First you need to disable "other things" on the UART that the DMX board uses.
sudo systemctl disable serial-getty@ttyAMA0.service
and remove "ttyAMA" or "serial0" from /boot/config.txt. (you'll find something like console=ttyAMA0,115200 there, remove that whole console= entry.
Most importantly: add:
init_uart_clock=16000000
to your config.txt file in the /boot directory.
Next, you need to configure ola to use the native-uart plugin. This is described at: http://www.raspberrypi-dmx.com/raspberry-pi-ola-dmx512-sender
Locate your ola-uartdmx.conf (on some systems I'm told it is in /etc/ola/conf/, on others /var/lib/ola/conf/, and in some cases: /root/.ola/ola-uartdmx.conf or /home/pi/.ola/ola-uartdmx.conf. One of the ways to find out is to look at the -c argument on your running olad.). Edit it and set enabled to true, set the correct device (ttyS0 on rpi3, ttyAMA0 on others), and add /dev/ttyAMA0-break = 100 and /dev/ttyAMA0-malf = 100 . It should then look like:
/dev/ttyAMA0-break = 100
/dev/ttyAMA0-malf = 100
device = /dev/ttyAMA0
enabled = true
Then set the board to output mode. I would recommend creating a small script (sudo nano /usr/bin/set_dmx_mode; sudo chmod 755 /usr/bin/set_dmx_mode) :
#!/bin/sh
# set_dmx_mode
if [ $# -lt 1 ] ; then
  echo 'on or off?'
  exit 1
fi

if [ ! -d /sys/class/gpio/gpio18 ] ; then
   echo 18 > /sys/class/gpio/export
fi
echo out > /sys/class/gpio/gpio18/direction
echo $1 > /sys/class/gpio/gpio18/value
then calling the script:
sudo set_dmx_mode 1
I recommend putting that line in /etc/rc.local so that it gets executed at boot time so you don't have to worry about it. (IIRC there is an "exit 0" in there, so don't put it AFTER that!)
Note that the earlier versions of the DMX board have a bug that when the GPIO pin is an input (not driven) it will configure the board as an output. This is not desirable. Newer versions (starting 1.4) will have this "fixed" and the "default" will be "DMX IN" mode.
This does mean that you can get away with forgetting about this gpio18 business if you have an older version. (I just realized I was getting away with this.... :-) )
